
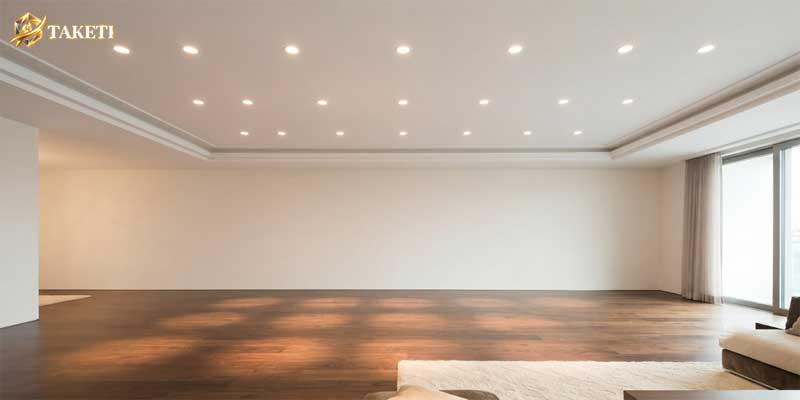
Few architectural upgrades redefine the perceived volume and functional capability of a room quite like professionally planned recessed lighting. Often referred to as pot lights or downlights, these flush-mounted fixtures disappear cleanly into drywall or plaster ceilings, washing walls and surfaces with clean, shadow-free illumination without cluttering your overhead visual airspace. Whether you are modernizing a cavernous family room or upgrading task illumination in a culinary workspace, mastering downlight layout geometry is essential for a polished interior.
Achieving professional-grade results requires looking far beyond simple fixture placement. Homeowners must navigate complex building codes involving thermal insulation contact ratings, calculate precise grid spacing to eliminate dark dead-zones, and select appropriate trim types to control beam glare. When paired with secondary accent fixtures like artisanal Table Lamps For Living Room or bedside Bedroom Table Lamps, a well-engineered recessed ceiling layout provides the architectural backbone for a complete layered lighting scheme.
Calculating Layout Spacing: The Half-Height Rule
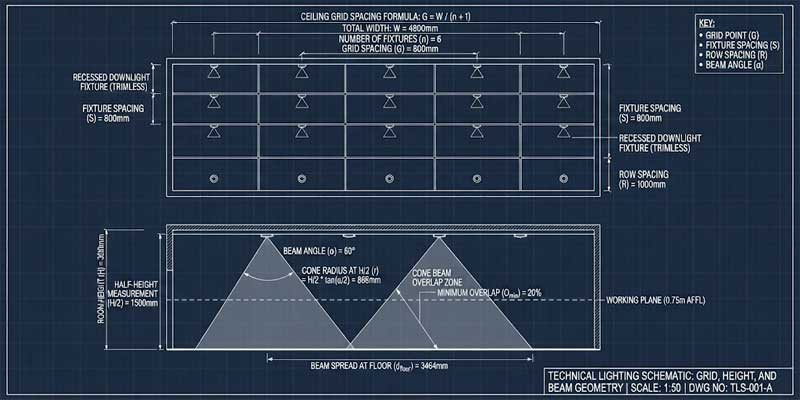
The single most common mistake DIY installers make with recessed lighting is either clustering too many fixtures together—creating an overly bright runway effect—or spacing them too far apart, resulting in dark, shadowy pools across the floor. Proper layout planning begins with measuring your ceiling height and applying standard architectural ratios.
1. The Ceiling-to-Floor Height Formula
The foundational rule for general ambient downlighting is the “Half-Height Rule”: the distance between adjacent recessed fixtures should equal roughly one-half of the floor-to-ceiling height. In a standard American home featuring 8-foot ceilings, fixtures should be spaced approximately 4 feet apart. For soaring 10-foot or vaulted ceilings, expand that distance to 5 feet apart to maintain balanced lumen coverage.
2. Perimeter Wall Offsets
Never install recessed fixtures flush against outer walls. Placing a can light directly against a vertical wall creates harsh, unflattering vertical glare lines while wasting half of its light output. To properly graze artwork, brick fireplaces, or textured wall finishes, position your outer row of fixtures approximately 2 feet to 3 feet away from the wall surface. This offset allows the cone of light to strike accent surfaces at a natural 30-degree angle.
IC-Rated vs. Non-IC Housing: Fire Safety and Insulation
Before selecting decorative trims or purchasing bulk fixture packs, you must verify the thermal classification of your ceiling cavity. Building safety codes strictly regulate how electrical enclosures interact with building materials:
1. IC-Rated Housings (Insulation Contact)
If your attic or ceiling joists are packed with fiberglass batts, blown cellulose, or spray foam insulation, you are legally and structurally required to use IC-rated recessed lighting housings. An IC-rated enclosure is thermally sealed, allowing insulation to rest directly against or cover the fixture box without posing a fire hazard or overheating the internal LED driver.
2. Non-IC Housings
Non-IC fixtures vent heat openly out of their top canisters. Installing a non-IC housing in an insulated ceiling acts like a chimney breach, melting insulation, creating condensation paths, and triggering potential electrical fires. Non-IC cans should only be utilized in unconditioned open basements or drop ceilings with zero direct thermal contact.
| Housing Classification | Insulation Contact | Air-Tight (AT) Seal | Primary Installation Zone |
|---|---|---|---|
| IC-Rated / AT | Direct contact permitted | Required (prevents conditioned air loss) | Attic floors, insulated bedroom & living ceilings |
| Non-IC Standard | Must maintain 3-inch clearance | Optional | Open uninsulated basements, commercial drop grids |
| Remodel Canisters | Dependent on model specs | Spring-clip gasket sealed | Retrofitting existing finished drywall ceilings |
Choosing the Right Trim: Baffle, Reflector, and Gimbal
The visible ring and interior insert of your fixture—known as the trim—dictates how light behaves as it exits the ceiling plane. Selecting improper trim styles can turn your ceiling into an uncomfortable glare trap:
1. Baffle Trims
Baffles feature stepped, ribbed interior grooves designed to absorb stray light rays and eliminate blinding overhead glare. They are the industry standard for general residential living rooms and bedrooms where soft, comfortable visual diffusion is paramount.
2. Reflector Trims
Reflectors feature smooth, mirror-like aluminum or polished chrome inner walls. They bounce and magnify light output, maximizing total lumen delivery. Reflector trims are ideal for high ceilings, commercial corridors, or high-humidity spaces where maximum punchy output is required.
3. Gimbal and Eyeball Trims
Gimbal trims allow the internal bulb socket to pivot up to 30 degrees in multiple directions. This directional flexibility makes them indispensable for sloped ceilings, highlighting kitchen countertops, or aiming task beams onto featured artwork.
Canister vs. Ultra-Slim LED Wafer Lights
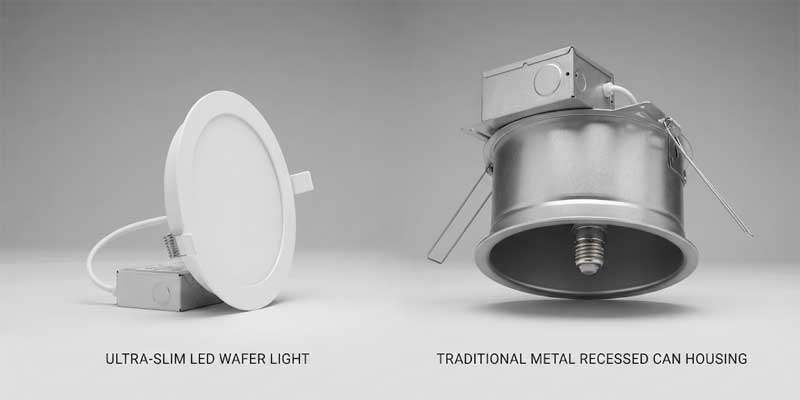
Modern remodeling has been revolutionized by ultra-slim, edge-lit LED wafer lights measuring less than half an inch in thick profile. Unlike traditional deep-can housings that require substantial vertical clearance inside ceiling cavities, wafer lights can install directly underneath wooden joists using remote junction boxes. However, standard cans still offer superior glare shielding because their light source is recessed deep within the ceiling plane, whereas ultra-slim wafers sit flush with the drywall, creating a wider, more exposed beam spread that can produce occasional side glare in low-ceiling environments.
Explore our complete curation of artisanal fixtures, contemporary designs, and home illumination guides by visiting Table Lamp to discover exceptional statement pieces for every room.
By carefully calculating your layout spacing, verifying IC thermal safety ratings, and selecting appropriate anti-glare trims, your new recessed lighting installation will deliver enduring architectural elegance and functional brilliance.
